Quick Answer (September 2026): The best Kingshot Bear Trap formation most top alliances I have seen run is 1/10/89 (Infantry / Cavalry / Archers) at Gen 4 and above — same split through Gen 5 and Gen 6. Treat it as the late-game baseline, then test your march preview because some accounts still perform better at 10/10/80, 5/5/90, or nearby variants. Keep at least 5,000 Infantry in absolute numbers once your march is large enough for that floor to matter. Earlier generations: 10/30/60 (Gen 1) · 10/20/70 (Gen 2) · 10/10/80 (Gen 3).
Best S+ joiner pool: Chenko, Amadeus, Yeonwoo, Amane, Margot, Vivian, Wee & Woo, Ava, and Luna. For best results, mix a Chenko/Amadeus/Yeonwoo-type skill with an Amane/Margot-type skill in the same rally rather than stacking duplicates — they multiply against each other instead of just adding (more in Damage Mechanics Explained). Use the best leveled first Expedition skill available for slot 1. No good hero available? Send troops only — that's genuinely better than sending the wrong hero. Rewards change after kingdom day 70: early servers get Howard Shards, older servers get more Forgehammers and Lucky Hero Gear Chests.
Most alliances plateau around 800–900 million damage and can't figure out why. Nine times out of ten it's the same two problems: someone's sending Jabel as their joiner hero, and the R4 is opening too many rallies at once. Fix those two things alone and you'll jump closer to the 1.2B milestone faster than you'd expect.
Bear Trap is the single most important recurring alliance event for gear progression. Every Forgehammer you'll ever need flows from here. Miss events consistently and your gear falls behind in ways that are genuinely hard to recover from.
Mechanics and formation notes were reviewed against May 2026 Bear Trap cycles, with Gen 7 joiner notes added in June, Gen 8 joiner notes added in September, and Auto-Register timing updated for the July 8 patch. The exact personal best split can still move with your hero gear, lethality research, and server generation, so use the march preview damage number as the final check.
Looking for more progression tips? For gear progression, check the Gear Guide. For Hero Roulette and gem spending, see the Gem Spending Guide. Unsure what to buy in the Alliance Store? The F2P Guide covers Alliance Store priorities and more.
👉 Recommended Next Steps
- Hero Tier List
- Troop Formations Guide
- VIP Calculator
This guide covers the full picture: basic mechanics for newer players, the by-generation formations most guides get partially right, the joiner hero decisions almost everyone gets wrong, and the coordination math that R4/R5 players need but rarely find documented properly. Whatever your level, there's something here that'll move your numbers.
Jump To
- How the Bear Trap Event Works
- Best Bear Trap Formation by Generation
- Blue Heroes in Bear Hunt
- Joiner Hero Tier List
- Rally Host Heroes by Generation
- Pitfall Upgrade System
- Pets: What Helps and What Doesn't
- Damage Mechanics Explained
- Alliance Coordination — R4/R5 Guide
- The 30-Minute Timeline
- Strategy by Player Type
- Pre-Event Checklist
- Reward Breakdown
- What NOT to Do
- FAQ
How the Bear Trap Event Works
Duration: 30 minutes per hunt
Frequency: Every 2 days — triggered manually by R4 or R5
Type: Alliance Cooperative PvE
Cost: Nothing — no stamina, no troop losses, no injuries, no resources consumed
Reward Tiers: Two server-age groups — kingdom days 1–69 and kingdom day 70+
Primary Reward: Forgehammers (the main crafting material for hero gear upgrades)
The One Thing That Changes Everything
The bear does not fight back. There are no injuries, no troop losses, nothing. Every defensive stat on your account is worthless for this event — Lethality and Attack are the only two stats that matter, full stop.
This sounds obvious but it has huge implications. It means any troop formation built around survivability is wrong here. It means heroes with defensive or economic skills in a joiner slot are actively harmful — not just useless, but actively displacing someone else's better skill. It means the entire game for 30 minutes is simply: deal as much damage as possible, as many times as possible.
Why Chenko's skill is so strong: Attack and Lethality are both multipliers in the damage formula, and a flat percentage buff to either one produces the identical proportional damage gain — a +25% Lethality skill and a +25% Attack skill are mechanically interchangeable on their own. What actually separates the best joiner heroes from each other is how their skills stack with each other. Chenko, Amadeus, and Yeonwoo's skills share the same internal buff category, so they add together (two of them gives +50% total, not a compounded amount). Amane and Margot's skills sit in a different buff category that multiplies against the first group instead of adding to it. That's the real reason a rally mixing Chenko-type and Amane-type skills outperforms one stacked with four of the same hero — see The Chenko Decision below for how to use this when picking who to send.
What Rally Leaders vs. Joiners Actually Contribute
This table is the foundation of everything. Host and joiner have completely different jobs.
| Contribution | Rally Leader | Rally Joiner |
|---|---|---|
| Own troops | ✅ Yes | ✅ Yes |
| Combat Research bonuses | ✅ Yes | ❌ No |
| Governor Gear & Charms | ✅ Yes | ❌ No |
| Hero Equipment stats | ✅ Yes | ❌ No |
| All 3 hero skills | ✅ Yes | ❌ No |
| Pet bonuses | ✅ Yes | ❌ No |
| Cosmetic buffs | ✅ Yes | ❌ No |
| Hero skill contribution | All 3 heroes, all skills | 1st hero's 1st Expedition skill ONLY |
This is where most players get it wrong. As a joiner, the only hero thing that matters is your first hero's first Expedition skill. The game picks the top 4 highest-level joiner skills per rally and ignores the rest. If your first hero has a weak or defensive skill, you are physically taking away a slot that could've gone to someone with Chenko. Sending no hero at all is better — your troops still contribute fully to the rally's damage.
One nuance on skill stacking worth knowing: flat buffs like Chenko's +25% Lethality are additive and stack across multiple joiners who share the same buff category — four Chenkos in one rally compounds significantly. But a different-category skill like Amane's Attack buff multiplies against that stack rather than adding to it, which means a mixed rally beats a duplicate-stacked one (full breakdown in Damage Mechanics Explained). Chance-based skills like Jabel's do not stack at all — two Jabels gives you exactly the same result as one. Keep this in mind when your alliance is coordinating who sends what.
How the Game Picks the 4 Joiner Skills
Only four joiner skills are ever active in a rally, and the order people join in decides which four — until skill level overrides it. Getting this right is what separates alliances that fill all four slots with S+ skills from ones leaking damage without ever realizing it.
The selection works in two stages:
- The first four to join each hand the rally their first hero's first Expedition skill. Those are the four active buffs at that moment.
- From the fifth joiner onward, the game re-sorts by skill level. If someone in the first four brought an under-leveled skill, a later joiner with a higher-level version can bump them out. A maxed skill can't be bumped by anything — once a Level 5 skill is in, it's locked for the rest of the rally.
That two-stage rule cuts both ways:
- Good: a wrong or weakly-leveled hero that sneaks into the early four can still be overwritten by better joiners arriving later — as long as that early skill isn't maxed.
- Bad: if someone joins early with the wrong hero and that hero's first skill happens to be maxed, nobody can overwrite it. It occupies one of the four slots for the whole rally and adds zero damage. The only fix is the rally host removing that player — which is exactly why hosts should watch their slots (see Managing Hero Skill Slots as Host).
The fix for capacity-limited players. You can't put a hero in slot 2 or 3 without one in slot 1 — so if you need those extra heroes for the Deployment Capacity but you're out of correct joiner heroes, don't fill slot 1 with a maxed wrong hero. Put a hero whose first Expedition skill is Level 1 there instead. A Level 1 skill is the easiest thing in the game to overwrite, so any correct joiner arriving after you slots right past it — you keep your march capacity without locking a bad buff into the rally. It's the polite version of "send troops only" for players who can't afford to drop the extra capacity.
Best Bear Trap Formation by Generation
The formation shifts toward Archers as you progress through generations because the math behind which troop type deals the most damage changes with your hero stats. Here's the full progression — the current formation baseline, with Gen 8 joiner notes added in September 2026.
Formation by Generation
| Generation | Infantry | Cavalry | Archers | Notes |
|---|---|---|---|---|
| Gen 1 | 10% | 30% | 60% | Cavalry heroes have the strongest stats at this stage |
| Gen 2 | 10% | 20% | 70% | Archer heroes are catching up — shift the split |
| Gen 3 | 10% | 10% | 80% | The 10/10/80 most players learn and never update |
| Gen 4 | 1% | 10% | 89% | Rosa arrives — 1/10/89 becomes the common late-game baseline |
| Gen 5 | 1% | 10% | 89% | Vivian's army-wide damage taken buff replaces older rally leads |
| Gen 6 | 1% | 10% | 89% | Yang takes the top archer slot — 7,200 base ATK |
| Gen 7 | 1% | 10% | 89% | Ava can host once built; Wee & Woo joins the flat-buff joiner pool, but skill level still decides |
| Gen 8 | 1% | 10% | 89% | Luna is both an Archer host and a top-end Group B joiner; Diego and Liz stay home |
⚡ Optimize your setup
Use the calculator: VIP Calculator
If you're Gen 4+ and still using 10/10/80, test 1/10/89 on your march screen. In most late-game Bear Hunt setups I have reviewed, 1/10/89 beats the old Gen 3 ratio, but 5/5/90, 1/5/89, and 10/10/80 can still win on specific accounts depending on troop count, hero investment, and Archer-vs-Cavalry stats. Treat your preview damage number as the tie-breaker.
One hard rule once your march capacity is high enough: keep at least 5,000 Infantry troops in absolute numbers. At smaller march capacities, the percentage floor matters more. Once 1% of your march can dip below 5,000 troops, calculate the absolute count and nudge Infantry up if needed.
Why You Can't Just Go 100% Archers
The instinct is to push Archers as high as possible since they deal the most damage — and that's right. But Infantry and Cavalry exist in your formation to activate their hero's troop-type specific buff skills. A hero like Helga gives massive percentage bonuses to Infantry stats. Remove Infantry from your march and you throw away that entire buff. The minimum percentages for Infantry and Cavalry exist purely to trigger those hero bonuses, not for their own damage contribution.
Finding Your Personal Optimum
For later-generation players, or anyone deep into a generation: when your Archer Lethality clearly outpaces your Cavalry Lethality, start nudging Cavalry down in 5% increments and Archers up accordingly. Test by adjusting the split on the march screen and watching your estimated single-hit damage — the split that gives the highest number is your current personal optimum. Takes two minutes and is worth doing after any major gear or research upgrade.
Blue Heroes in Bear Hunt
Do blue heroes give more points in Bear Hunt? No. Hero rarity color — blue (Rare), purple (Epic), or gold (Legendary) — awards no bonus points or score in this event. Rally damage comes from exactly two things: the troops you send, and your first hero's first Expedition skill. As a joiner, your hero's own rarity, stats, and gear never transfer to the rally, so a blue hero and a purple hero with the same slot-1 skill contribute identically.
Where blue heroes actually fit:
- Joining in slots 2 and 3 — fine, use any of them. The second and third heroes only add march capacity; their skills do nothing for the rally, so rarity is irrelevant here. This is the one place a blue hero belongs.
- Joining in slot 1 — avoid. Slot 1 is your only skill contribution. If a blue hero's weak first skill lands in the rally's four active joiner skills, it can push out a stronger S+ joiner skill and lower total damage. Check the yellow flag menu before you confirm.
- Your own rally as the leader — never. As host, all three of your hero skills apply to the whole rally, so the lead slot needs your strongest offensive heroes, not a capacity filler.
Is Chenko a blue hero? No — Chenko is Epic (purple) rarity. The mix-up is common because Chenko comes up constantly in the "blue hero" joiner discussion, but the two are unrelated. Chenko is an S+ Bear Trap joiner because of her first Expedition skill — a flat +25% Squad Lethality — not because of rarity color.
Joiner Hero Tier List
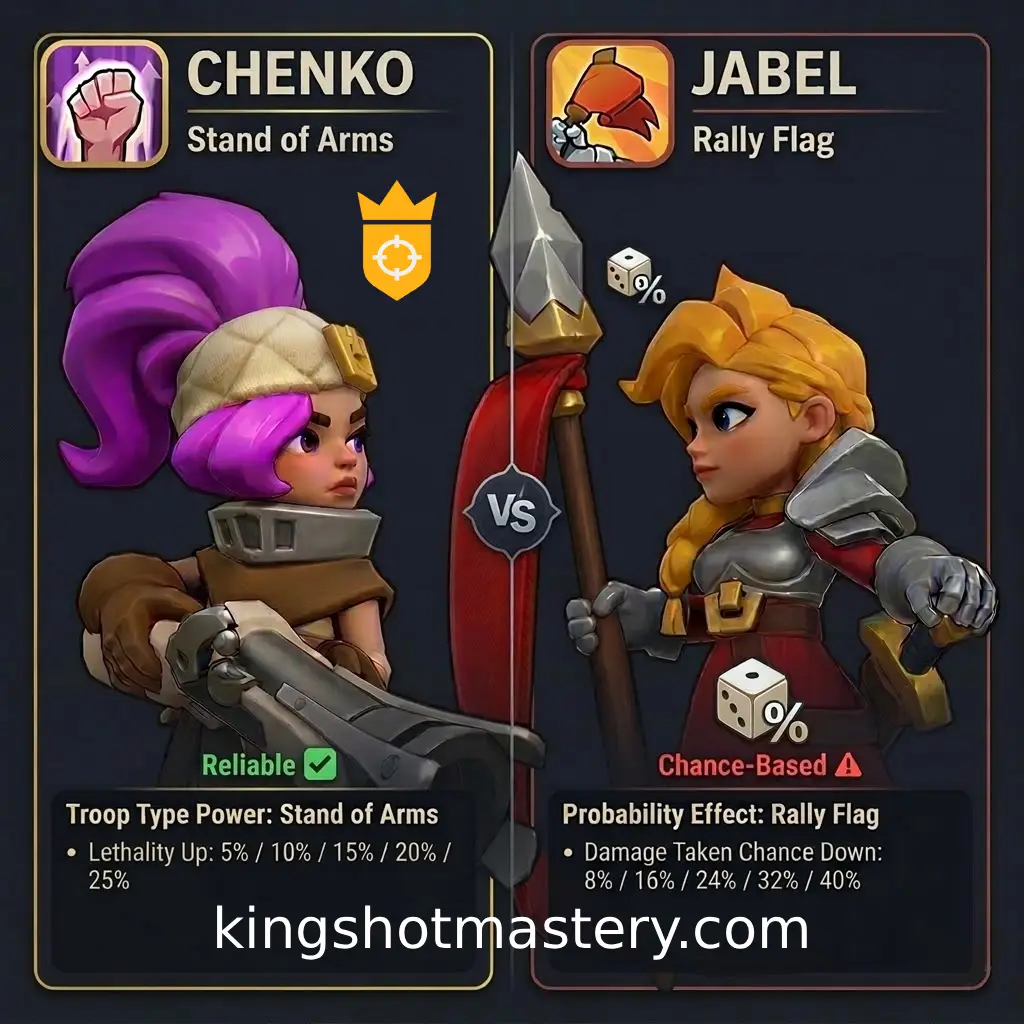
Chenko's Expedition skill (left) vs Jabel's (right). The Lethality buff in slot 1 is why Chenko is S+.
As a joiner your entire hero contribution is one thing: your first hero's first Expedition skill.
And that skill only reaches level 5 — its maximum — once the hero is 4★, which costs 475 shards including the unlock. Every joiner value quoted below is the level 5 number. A freshly unlocked hero brings a fraction of it, which matters twice over: you contribute less, and because the rally sorts joiners by skill level, you are also the one who gets dropped when a fifth player joins. The second and third heroes you bring only increase your march's troop capacity — their skills do nothing for the rally.
Joiner Tier List
| Tier | Hero | Skill Effect | Buff Group | Notes |
|---|---|---|---|---|
| S+ Tier | Chenko | +25% Squad Lethality | Group A | Best early-access joiner profile |
| S+ Tier | Amadeus | +25% Squad Lethality | Group A | Equal skill — but see the hosting vs. joining decision below |
| S+ Tier | Yeonwoo | +25% Squad Lethality | Group A | Same tier when properly leveled |
| S+ Tier | Amane | Attack boost | Group B | Multiplies against Group A — pair with 1–2 Group A skills rather than stacking alongside 3–4 of them |
| S+ Tier | Margot | Squad Attack | Group B | Multiplies against Group A — same stacking logic as Amane |
| S+ Tier | Vivian | Damage amplification | Unconfirmed | Offensive damage-taken amplification from her first Expedition skill; exact stacking group not verified |
| S+ Tier | Wee & Woo | Squad Attack + Lethality | Unconfirmed | Excellent if built; exact stacking group not verified |
| S+ Tier | Ava | Enemy Defense Down | Unconfirmed | Premium offensive debuff once the rally has Attack and Lethality covered; exact stacking group not verified |
| S+ Tier | Luna | +25% Squad Attack | Group B | Gen 8. Driving Light matches Amane/Margot exactly — same skill shape, same +25%, same buff group |
| A-Tier | Hilde | +15% Attack | Unconfirmed | Reliable fallback after Chenko/Amadeus/Yeonwoo/Amane-style options are unavailable |
| A-Tier | Thrud | Archer + Infantry specific Attack | Unconfirmed | Not chance-based, slightly weaker than Hilde but underrated |
| B-Tier (Max One Per Rally) | Marlin, Zoe, Jaeger, Petra, Liz | Chance-based buffs | N/A | One is fine. Stacking multiples is a waste — they don't compound. |
| Never Send | Jabel, Gordon, Edwin, Longfei, Helga, Diana, Diego, Charles | Defensive, non-damage debuff, or economic skills | N/A | Troops only is genuinely better |
Group A vs. Group B, in plain terms: skills in the same group add together — two Group A skills (e.g. Chenko + Amadeus) gives +50% total, not a compounded amount. Skills in different groups multiply against each other instead, which compounds to a bigger total damage boost than stacking duplicates from one group. Practical takeaway: a rally running 2x Group A + 2x Group B skills outdamages a rally running 4x Group A skills, even though every hero involved is individually "S+." Vivian, Wee & Woo, and Ava's exact stacking group hasn't been independently confirmed — treat them as strong standalone picks, but don't assume how they interact with Chenko or Amane until that's verified.
Why these heroes rank where they do — see their actual Expedition skills:

Chenko


Chenko implements advanced weaponry for our soldiers, increasing the total Squads' Lethality by X

Enhances troop armor with a keen engineering eye, reducing damage taken by X for all troops

Amadeus

Young ranger Amadeus excels in boosting morale, increasing the total Squads' Lethality by X

Amadeus imparts the secrets of swordsmanship, increasing the total Squads' Attack by X
Amadeus' unique swordplay has a X chance of increasing damage dealt by 50% for all squads

Yeonwoo

"My blade and I are one". Yeonwoo's sword skills increase all Squads' total Lethality by X

Yeonwoo's travels have secured a technological edge, increasing Research Speed by X

Amane
Amane's trademark formation increases all Squads' total Attack by X

Amane's skill at warding off evil increases Infirmary Healing Speed by X

Margot
Margot's focus on armor-penetration increases total Squads' Attack by X

Within Margot's haphazard positioning lies careful strategy. Her presents grants all Squads a X chance of dodging Normal Attacks

Margot's Cavalry have a 25% chance of performing an extra attack, dealing X damage

Vivian
Vivian is a patient commander willing to wait for just the right moment to strike. All squads' attacks increase enemy damage taken by X

Vivian's sharp focus exposes enemy weaknesses, granting all squads' attack X extra damage after every four attacks, and causes the target to receive X extra damage for its next attack received
Vivian equips her Archers with custom coin traps, dealing X extra damage to all enemies on the next attack of every 4 attacks

Ava

An artist sees what others cannot. Ava's deconstructive gaze sees vulnerabilities, reducing total Enemy Squad's Defense by X.

Bright light and dark shadow can blind enemies who do not expect it. All enemy soldiers receive X increased damage for 2 turns every 4 turns.

Ava's weapons are like twin beacons for all to follow, increasing soldiers' Lethality by X.
Wee & Woo
The inclusion of the artillerymen has an overall helpful effect of increasing Squad's total Attack by X and total Lethality by X.

Wee & Woo's devastating back-to-back rounds tear shreds through the enemy lines, increasing Squad's Damage Dealt to Archer by X and to Infantry by X.

"There's always someone in every cannon duo who can aim well." Wee & Woo's presence gives Squad's Attack a X chance of dealing 50% extra damage.
Luna

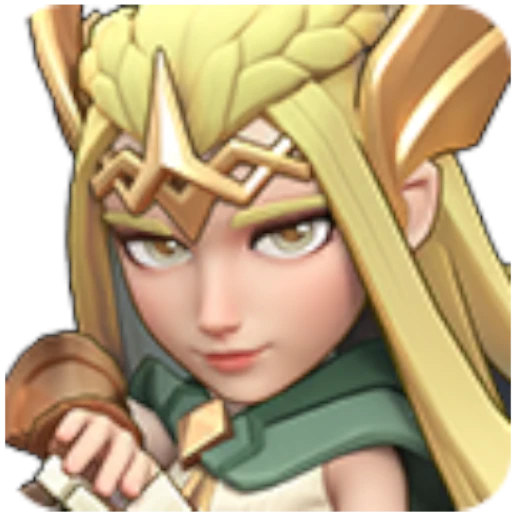
Luna's lunar light drives away wickedness, increasing total Squad's Attack by X.

Luna's thirst for vengeance is a snare of ill-fortune against enemies, reducing enemy Squad's Attack by X for 1 turn every 2 turns.

Improvements in arrowheads have made their trajectory much less predictable, granting our archers an extra X damage to the target with each attack.

Hilde

Hilde's exhaustive discipline develops soldiers into true weapons, increasing the total squads' Attack and Defense by X and X

Hilde uses her secret tonic to enhance the warriors' strength, granting all squads' attack a 25% chance of dealing X damage
Hilde's devout prayer has a X chance of reducing damage taken by 50% for all squads
On Longfei specifically: He has two defensive skills and only one offensive skill, making him actively worse than even some B-Tier options. A lot of players assume newer generation heroes are automatically better for this event — not true. Longfei is a trap. Ava, Wee & Woo, and Luna are S+ because their first Expedition skills bring real offensive value: Ava brings Enemy Defense Down, Wee & Woo bring direct Squad Attack + Lethality, and Luna brings +25% flat Squad Attack. Gen 8's other two are the counter-example — Diego's first Expedition skill is defensive and Liz's is chance-based, so being a generation newer buys them nothing here.
S+ joiner nuance: Chenko, Amadeus, Yeonwoo, Amane, Margot, Vivian, Wee & Woo, Ava, and Luna are the premium joiner pool. Skill level still matters inside that pool: a better-leveled first Expedition skill can beat a newer hero that is barely built. Within that pool, also think about buff group — mixing a Group A skill with a Group B skill produces more total damage than relying on Group A alone (see the callout above).
The Chenko Decision: When to Send, When to Hold
- Fewer than 2 Group A skills (Chenko/Amadeus/Yeonwoo) in the rally? Send one of them as your first hero — these three skills stack additively with each other, so the first two are straightforward, uncomplicated value.
- Already have 2 Group A skills locked in, and you have a leveled Amane or Margot? Send that instead. A Group B skill multiplies against the Group A pair rather than adding to it, so it's worth more in that slot than a 3rd or 4th Group A skill would be.
- No Amane or Margot available, but more Group A heroes are? Sending a 3rd or 4th Group A skill still adds real value — just less than a Group B skill would in that same slot. It's still far better than a weak or chance-based hero, or an empty slot.
- Slots already full with a good mix? Send troops only, or use extra heroes in slots 2 and 3 for capacity. A maxed blue hero or weak offensive hero in slot 1 can accidentally overwrite a better skill and reduce the rally's total damage.
- Always check the yellow flag menu inside the rally before confirming your join — it shows which 4 joiner skills are currently active, so you can tell whether the rally needs another Group A skill or a Group B skill to round out the mix. Five seconds of checking prevents a mistake that costs your alliance damage.
Amadeus: Host or Joiner?
This is genuinely one of the more nuanced decisions in Bear Hunt. Amadeus as a host provides strong buffs to the 15 players in one rally. Amadeus as a joiner contributes his S+ Lethality skill to multiple different rallies throughout the 30 minutes.
If your Helga is well-developed (4–5 star, solid Widget), let Helga host your main rally and use Amadeus to join several others. The combined damage contribution across the full event will typically be higher than having Amadeus anchor one rally the whole time. If no one else can host at a competitive level, Amadeus hosts — no debate.
Secondary Marches
If you have secondary marches available, use extra S+ joiners — Chenko, Amadeus, Yeonwoo, Amane, Margot, Vivian, Wee & Woo, Ava, or Luna — to join different rallies simultaneously while your primary march is in another. When picking which secondary joiner to send where, try to land a different buff group than what's already active in the target rally: a Group B skill (Amane/Margot) is worth more in a rally already running 2+ Group A skills (Chenko/Amadeus/Yeonwoo) than a 3rd Group A skill would be. Strong accounts contributing skills to 2–3 rallies at once is one of the highest-leverage moves available to top-tier players. If you have this capability and aren't using it, start.
Rally Host Heroes by Generation
As host, all three of your hero skills apply to the entire rally. This is where individual hero investment has the most leverage in Bear Hunt — your upgrades benefit every player who joins you.
Gen 1 Rally Host
Best: Amadeus · Jabel · Quinn
F2P: Howard · Jabel · Quinn
Formation: 10% Infantry / 30% Cavalry / 60% Archers
At Gen 1 you're working with limited options. Amadeus is the clear best host because his raw Infantry stats are the highest available. The thing to avoid here: don't use Diana even if she looks strong on paper — she's an economic hero and her skills contribute nothing to bear damage. Quinn outperforms Diana here because Quinn has a damage-increasing skill.
F2P Gen 1 players: your primary job is Intel Missions daily and joining every rally you can. Your individual damage is secondary to keeping the Pitfall maxed and showing up consistently.
Pitfall Upgrade System
The Pitfall should be at Level 5 before the first rally launches. The +25% Attack bonus applies to every troop in every rally for the full event. Not maxing the Pitfall costs your entire alliance damage — it's not optional and it's not close.
Pitfall Upgrade Table
| Level | Arrows Required | Running Total | Attack Bonus |
|---|---|---|---|
| 1 | 200 | 200 | +5% |
| 2 | 300 | 500 | +10% |
| 3 | 400 | 900 | +15% |
| 4 | 500 | 1,400 | +20% |
| 5 (Max) | 500 | 1,900 | +25% |
The Arrow Math
- Every member earns 24 arrows per day from Intel Missions
- 40 active members × 24 = 960 arrows/day
- 960 per day over 2 days = 1,920 arrows — enough to max the Pitfall every cycle
One thing almost no guide mentions: stop donating once the Pitfall hits Level 5. Extra arrows aren't banked for the next enhancement — they're wasted. R4/R5 should post in alliance chat when the cap is hit so members don't burn arrows unnecessarily.
Intel Mission completion should be a clear alliance expectation, not a casual suggestion. One member skipping daily arrows is small. Across a 40-person alliance with inconsistent completion over 2 days, the gap is the difference between a Level 3 and Level 5 Pitfall — a real 10–15% damage penalty across every rally before anyone even launches.
Pets: What Helps and What Doesn't
This section gets skipped in almost every Bear Hunt guide, which means a lot of players are activating useless skills before this event without realizing it. For the full upgrade and refinement order behind these choices, use the Kingshot Pet Guide.
Pets Worth Activating Before Bear Hunt
| Pet | Relevant Skill | Why It Helps |
|---|---|---|
| Mighty Bison | Squad Capacity +15,000 (2h) | More troops per march = more damage per rally. Critical for rally hosts. |
| Black Panther | Troop Lethality +10% (2h) | Direct damage buff — Lethality is the stat you want most |
| Giant Rhino | All Squad Attack +10% (2h) | Solid flat attack multiplier across all troop types |
| Moose (Rally Capacity variant only) | Rally Capacity +150,000 (2h) | For bear callers only — increases how many joiners your rally can hold |
Activate these right before launching or joining your first rally. The 2-hour window comfortably covers the full 30-minute event. Don't forget — unused activated skills are wasted cooldowns.
The Pet That Does Absolutely Nothing Here
The Moose's "Horror Stare" skill is completely useless in Bear Hunt. Horror Stare reduces enemy Squad Health. The Raging Bear does not have a Health bar — it only has Defense. The skill targets a stat the Bear doesn't have, so it contributes zero damage. If you've been activating this before Bear Hunt thinking it helps, stop — you're burning the cooldown for nothing.
This is probably the most commonly wasted pet activation in the game. The Moose is strong in PvP. Just not here.
Damage Mechanics Explained
You don't need to understand formulas to play Bear Hunt well. But knowing the mechanics behind the meta will help you make smarter decisions as new heroes arrive and the game evolves.
Two Different Reasons Stats Matter: Gear Points vs. Skill Percentages
There are two separate mechanics here, and a lot of guides (including earlier versions of this one) blur them together.
Raw stat points — gear, research, Charms. Attack and Lethality are both multipliers in the damage formula, so adding the same number of raw points to whichever stat is currently lower gives the bigger proportional gain. If your Attack is 10,000 and your Lethality is 2,000, adding 500 Lethality moves that multiplier by 25%, while adding 500 Attack only moves it by 5%. Same raw number of points added, dramatically different proportional result. This is the real argument for prioritizing Lethality-focused Governor Gear (goggles, boots) and Academy research — but check your own numbers, since whichever stat is actually lower on your account is the one worth investing in, not Lethality by default.
Hero skill percentages — Chenko, Amadeus, Amane, and so on. This is a different mechanic, and it has nothing to do with which stat starts lower. A flat +25% Lethality skill and a flat +25% Attack skill produce the identical proportional damage gain, because Attack and Lethality multiply each other in the formula — a 25% boost to either factor is a 25% boost to their product. Chenko isn't S+ because Lethality "starts lower" on most accounts; she's S+ because her skill is a reliable, additive flat buff — the exact same logic that makes Amane and Margot (Attack-focused) equally S+.
What actually decides how much a rally's joiner skills are worth isn't Attack-vs-Lethality at all — it's whether the active skills stack additively or multiplicatively with each other:
- Chenko, Amadeus, and Yeonwoo share the same internal buff category, so their skills add together. Two of them gives +50% total, four gives +100% — straightforward addition.
- Amane and Margot sit in a different buff category that multiplies against the first group instead of adding to it.
That means a rally running 2x Chenko-type + 2x Amane-type skills produces a noticeably bigger total damage multiplier than a rally running 4x of the same hero, even though every individual skill listed is "S+" in isolation. Practically: once a rally has 2 Group A skills locked in, the next-best slot is a Group B skill, not a 3rd or 4th Group A skill (see The Chenko Decision for the full breakdown).
Expedition Skills vs. Widget (Exclusive) Skills
Not all hero skills behave the same way:
- Expedition skills (standard hero skills) — additive within their buff group. They add flat percentages that stack linearly with other skills sharing the same buff category.
- Widget Exclusive skills — can be additive or multiplicative. Multiplicative skills scale proportionally with your existing stats.
A multiplicative 10% Widget boost on a high-Lethality account is worth dramatically more than a flat +10% additive boost. This is why maxing the Widget on your key heroes — Chenko, Amadeus, Helga — is such a high-priority investment. The return scales with how strong your other stats already are.
The 5,000 Infantry Floor
Bear Hunt's damage formula appears to punish very low Infantry counts more than the percentage alone suggests. The practical rule I use: at Gen 4+ with 1/10/89, calculate the absolute number — if 1% of your march is fewer than 5,000 troops, test nudging the percentage up until you're above it and compare the march preview damage.
How the +25% Pitfall Bonus Interacts With Archers
The Pitfall Attack bonus applies equally by percentage to all troop types. But since Archers have the highest base Attack, they receive the largest absolute boost. This is another layer of why Archer-heavy formations extract more value from a maxed Pitfall than balanced ones.
Stat Priority Order
Roughly in order of impact for mid-to-late game: Archer Lethality → Archer Attack → Troop Deployment Capacity → Cavalry Lethality. Push these through Governor Gear (goggles and boots first), Academy Research, Islands, War Academy, Governor Charms, and Chief Gear. Long term: T11 Archers and Truegold upgrades compound across every event you'll ever do.
Alliance Coordination — R4/R5 Guide
If you're leading your alliance's Bear Hunt, this section covers what most coordination guides skip.
Schedule Both Traps Strategically
You have two Hunting Traps. Don't just pick times that work for you personally. Poll your members to find the two time windows with the most participation overlap, then schedule Trap 1 and Trap 2 accordingly. A slightly inconvenient time with 38 active members beats your preferred time with 22.
After the July 8 update, Auto-Register can schedule a Bear Hunt for the exact moment the trap cooldown ends. The previous extra five-minute delay is no longer required. Alliance leaders can use the cooldown endpoint directly when planning consecutive trap windows instead of padding the schedule by five minutes.
Cluster Your Rally Leaders Near the Pitfall
Before the event starts, your strongest rally leaders should teleport close to the Pitfall. March time directly caps how many rallies they can lead in 30 minutes. Leaders within 15 seconds of the Pitfall can run significantly more rallies than ones 90 seconds away. This is a real and significant damage difference, not a minor optimization.
Joiners don't need to be right next to the Pitfall — just within a reasonable marching distance so they're not burning a third of the event in transit.
Solving the Instant-Fill Problem (The Formula)
The biggest operational Bear Hunt problem: rallies fill in 3 seconds and half your alliance can't get into anything. Here's the exact fix.
Calculate your per-joiner troop cap:
- Take your strongest host's total Rally Capacity (e.g., 1,132,210)
- Subtract their Squad Capacity (e.g., 162,210)
- Available joiner space = 970,000
- Divide by 14 available joiner slots = ~69,285
- Round to a clean number: 69,000 troops per joiner
Post this cap before every Bear Hunt. Tell everyone to set their formation preset to exactly this troop count. Strong players get capped, rallies stay open longer, everyone participates. Simple change, real damage increase.
Fill Rallies From the Top
Once your alliance is using troop caps, do not cherry-pick only the biggest names unless leadership has specifically called for that. A full rally is usually more valuable than five almost-full rallies sitting at 80–95% capacity. The cleaner habit is simple: clear favorite filters, join the top available rally first, and keep cycling as soon as marches return.
The exception is the opening burst. In the first wave, strongest joiners should still prioritize the designated top hosts so the best joiner skills land where they matter most. After that, speed and full rallies matter more than hunting for the perfect target every time.
Managing Hero Skill Slots as Host
You can kick joiners who bring the wrong hero. If someone joins with Jabel or Edwin while the 4 skill slots aren't full, remove them — but explain why in alliance chat. Most players don't understand the mechanic. Building a culture where people know why it matters is more valuable long-term than just kicking silently.
The Strong Group Strategy
For alliances with 4–6 genuinely elite players: hold your rally restricted for 10–15 seconds to let these players join first, then open it. The difference in total damage when all 4 joiner skills are Chenko-or-better vs. a mixed pool is substantial. Once those players are locked in, open the rally to everyone else.
Simple Wave Template
If every host launches at the exact same second, the joiner pool spreads thin and the early rallies fill unevenly. A cleaner setup:
- 30:00 remaining: first row / strongest hosts launch.
- 28:30–29:00 remaining: second row launches.
- 27:00–28:00 remaining: third row and remaining approved hosts launch.
- 7:00 remaining: everyone launches if they have a march available.
You can tune the spacing for your alliance, but the principle stays the same: start with quality, then widen the rally pool as marches begin returning. By the last few minutes, available rally slots are more important than host perfection.
The 30-Minute Timeline
| Phase | Time Window | What to Do |
|---|---|---|
| Pre-Hunt | 5 min before | Recall gathering troops, activate pet skills, equip Lethality gear, confirm formation preset |
| Opening | 0–5 min | Top hosts launch rallies immediately; strongest joiners fill those first |
| Mid-Hunt | 5–23 min | Continuous cycling — troops return, rejoin immediately, repeat |
| Final Push | 23–30 min | Everyone opens a rally, regardless of account strength |
The Final Push is the one that surprises people. In the last 5–7 minutes, every member — even weaker ones — should open a rally. Not because their rally will be strong. Because opening a rally creates spots for stronger players whose troops are returning from previous rallies. More open spots in the final minutes = more attacks before the timer expires = more total alliance damage. It's a simple mechanic that a lot of alliances leave on the table.
There's no personal cooldown between Bear Hunt attacks. Your only bottleneck is march time. That's why castle positioning near the Pitfall matters so much — it's not cosmetic, it's directly limiting how many rallies you can participate in over 30 minutes.
How to Split Troops Across Marches
If you have enough troops to fill every march at the alliance cap, spread them out and keep all marches cycling. More attacks usually beats one oversized march sitting idle.
If you are troop-limited, make the decision based on rally quality. When one host is doing several times more damage than everyone else, it can be worth maxing that rally first and spreading the remainder afterward. If your alliance has several strong hosts, split troops across more rallies so you are attacking more often. The goal is not a perfect-looking preset — it is the highest number of completed hits during the 30-minute window.
Strategy by Player Type
F2P Strategy
Your goal is consistent contribution — showing up every event, donating arrows, joining as many rallies as possible with the right setup. You're not carrying the alliance but you're not deadweight either.
- Intel Missions every day without exception. Your 24 arrows are more impactful toward the alliance's total damage than they look individually.
- Don't host unless you're genuinely top 10–15 by power. Hosting before you're ready wastes 15 joiners' contribution.
- Save shard pulls for Chenko. Her joiner skill is the single best return-on-investment for a non-hosting F2P player in this event.
- If you don't have a leveled S+ joiner hero, send zero heroes. Not Jabel. Zero.
- Save your formation as a preset. One-tap joining before a rally fills matters more than you'd think over 30 minutes.
Don't skip this event. Bear Hunt is your primary consistent source of Forgehammers. Missing even a handful of events compounds into a gear progression gap that takes weeks to close.
Pre-Event Checklist
Run through this before every Bear Hunt. The mistakes always happen on the events where you skip the checklist.
- Complete Intel Missions and donate your 24 Hunting Arrows
- Confirm Pitfall is at Level 5 (+25% Attack) in the alliance building tab
- Recall all gathering troops — use an Advanced Teleporter if they're far out
- Load your formation preset with the correct ratio for your generation
- Equip Lethality-focused Governor Gear and Charms
- Activate pet skills (Mighty Bison, Black Panther, Giant Rhino) timed to start with the event
- Move your castle within 25 seconds march time of the Pitfall
- Set first hero slot to your best joiner hero — or clear it if you don't have one leveled
- Check alliance chat for host assignments and any troop cap from R4/R5
Reward Breakdown
Primary Rewards:
- Forgehammers — The main reason this event exists for most players. Essential for hero gear upgrades and difficult to accumulate consistently outside Bear Hunt.
- Lucky Hero Gear Chests — Hero gear progression rewards on older servers.
- Howard Shards — Early-server Bear Hunt reward before the day-70 reward swap.
- Alliance Tokens and resources — Scaled by damage tier.
How Rewards Scale:
- Kingdom days 1–69: Bear Hunt damage rewards include Howard Shards.
- Kingdom day 70+: Howard Shards are replaced by more Forgehammers and Lucky Hero Gear Chests.
- Trap 1 and Trap 2 use the same reward tables, but their damage records and rankings are tracked separately.
Smart Milestone Play: Once you've locked in a reward tier and the next one is out of reach, consider giving up your spot to an alliance member who's close to their next milestone. You've already secured your rewards — it costs you nothing and directly helps someone else progress. Good alliances coordinate this in the last 5 minutes.
Why your two servers show different rewards: Bear Hunt has separate reward groups by kingdom age. A newer server in days 1–69 shows Howard Shards. Once a kingdom reaches day 70, the same damage thresholds switch to the Forgehammer + Lucky Hero Gear Chest reward group.
Personal Damage Rewards
The damage thresholds are the same for both reward groups. Bread and Wood always match except where shown exactly below.
Days 1–69 (Howard)
Day 70+ (Forgehammers)
Single-Event Damage Task Reward
This is the smaller one-time task reward tied to Bear Hunt damage:
| Kingdom Age | Reward |
|---|---|
| Days 1–69 | |
| Day 70+ |
Personal Damage Milestones
Personal Bear Hunt milestone rewards are based on your historical personal total damage. The first five are unique, then the table moves into a repeated reward pattern with special Truegold checkpoints.
| Personal Damage | Reward |
|---|---|
| 10,000 | |
| 45,000 | |
| 100,000 | |
| 235,000 | |
| 500,000 | |
| 1,200,000 | |
| Most later milestones | , , |
| Truegold checkpoints | , , |
Truegold checkpoints appear at 1.2B, 2.4B, 5B, 10B, 20B, 40B, and 72B personal historical damage.
What NOT to Do
Ranked by how much damage they actually cost — not just how common they are.
#1 — Sending the wrong joiner hero. Jabel, Gordon, Edwin, Longfei — any hero with a defensive or economic first skill — is actively harming your alliance's damage by occupying a slot that could go to Chenko. Jabel is useful in early progression because she's free and accessible; she is just bad in this specific Bear Hunt joiner slot. If you don't have a good hero leveled, send zero heroes. Say this out loud: zero heroes is better than the wrong hero.
#2 — Weak players hosting rallies. Your stats as host apply to everyone in the rally. An underpowered host with weak buffs leading 15 joiners wastes everyone's participation. R4/R5 should designate hosts beforehand and make the list visible to the alliance.
#3 — Skipping Intel Missions. 24 arrows seems minor. Across a 40-person alliance with inconsistent completion over 2 days, you end up with a Level 3 Pitfall instead of Level 5 — a real 10–15% alliance-wide damage penalty before the first rally even starts.
#4 — Troops out gathering at the event start. There's no personal cooldown between hits. Every minute your troops are stuck on resource tiles at the start of the event is direct damage lost that you can't get back. Recall everything beforehand.
#5 — Everyone opening rallies at the same time. When 10 hosts all launch simultaneously, the joiner pool scatters across all of them and each rally gets diluted hero skill quality. Stagger openings so joiners concentrate in fewer, higher-quality rallies early.
#6 — Running 10/10/80 when you're Gen 4+. The endgame formation is usually 1/10/89. A lot of experienced players learned the Gen 3 ratio and never updated their preset. If this is you, test both on the march preview and save the higher-damage preset.
#7 — Stacking four of the same buff-group joiner instead of mixing. Four Chenko-type skills in one rally is good, but it's still weaker than two Chenko-type skills plus two Amane/Margot-type skills, since the two groups multiply against each other rather than just adding. If your alliance has both types available, don't let a rally fill with duplicates when a different group is sitting unused.
FAQ
Do blue heroes give more points in Bear Hunt?
No. Hero rarity color gives no bonus points or score in Bear Hunt — that's a myth. Rally damage comes only from your troops and your first hero's first Expedition skill. Blue heroes are fine when you join in slots 2 and 3 (capacity only), but never lead your own rally with one and never put one in slot 1 when joining — a weak slot-1 skill can displace a stronger S+ joiner skill from the rally's active four. Check the yellow flag menu before confirming.
Is Chenko a blue (Rare) hero in Kingshot?
No — Chenko is an Epic (purple) hero, not blue/Rare. Players often ask because she dominates the "blue hero" Bear Trap conversation, but her rarity color has nothing to do with her value. Chenko is S+ purely because of her first Expedition skill: a flat +25% Squad Lethality. Rarity awards no Bear Hunt point bonus, so her color is irrelevant to scoring.
What is the best troop formation for Bear Trap in Kingshot?
It depends on your generation. Gen 1: 10/30/60 (Infantry/Cavalry/Archers). Gen 2: 10/20/70. Gen 3: 10/10/80. Gen 4 and beyond: 1/10/89 is my late-game baseline, while some accounts still do better at 10/10/80, 5/5/90, or nearby Archer-heavy variants. If you're Gen 4+ and still on the Gen 3 ratio, test both presets against the march preview damage. Keep at least 5,000 Infantry troops in absolute numbers once your march capacity makes that floor relevant.
Is it actually better to join Bear Hunt with no heroes?
Yes. If your best available first hero skill is weak, defensive, or chance-based, joining with zero heroes is the correct play. The game selects the top 4 joiner skills per rally. A bad skill from you displaces a better skill from someone with Chenko. Your troops still contribute fully to the rally's damage without the hero. This is how the mechanic actually works — not a myth.
Does a stronger player joining my rally increase my own damage?
No — this one is a myth. The belief is that when a whale joins your rally, the strength of their troops lifts your personal score too. It doesn't. Each joiner's troops only affect that joiner's own damage; they never raise anyone else's number. The only thing a joiner adds to the shared rally is their first hero's first Expedition skill — and only if it lands in the active top four. If stronger joiners actually inflated everyone's damage, whales would let only other whales into their rallies, and no server enforces anything close to that. Bring the right hero skill, not the biggest name.
Why is Chenko better than Jabel as a joiner?
Chenko's first skill is a flat +25% Squad Lethality — reliable, additive, stacks with other same-group Lethality buffs across the rally. Jabel's first skill is chance-based: it doesn't fire on every hit, and chance-based skills don't stack with each other. Over hundreds of hits in 30 minutes, a consistent multiplier is far more valuable than a probabilistic proc. Four Chenkos in a rally compounds to a large combined buff — though if your alliance also has Amane or Margot available, mixing in one or two of those compounds further still, since they multiply against the Chenko-type group rather than just adding to it (see Damage Mechanics Explained).
Should Amadeus host or join rallies?
If your Helga is well-developed (4–5 star with solid Widget), let Helga host your main rally and use Amadeus to join multiple others throughout the event. The combined Lethality skill he contributes across several rallies often outweighs his benefit anchoring one rally as host. If no one else can host competitively, Amadeus hosts — no debate.
Does hero gear matter for joiners?
No. As a joiner, your Governor Gear, Charms, and research stats don't transfer to the rally. Only your troops and your first hero's first Expedition skill contribute. Hero gear only matters for rally leaders, whose personal stats apply to the entire rally. Joiners: invest in leveling the hero skill, not the equipment.
Do territory bonuses or banners help in Bear Hunt?
Territory bonuses only apply when defending your city from attack — they don't apply when you're the attacker. So no, territory bonuses don't carry into Bear Hunt. Cosmetic buffs from island decorations and skins do apply for the rally leader specifically, so if you're hosting, those active. Joiners' decorations don't affect the rally.
How often does Bear Hunt happen in Kingshot?
Every 2 days. R4 and R5 can schedule it manually or by timer. You have two Hunting Traps — schedule them at different time windows to maximize participation across time zones rather than doubling up at the same slot.
What should I do if my troops are still gathering when the event starts?
Use an Advanced Teleporter to instantly recall all marching troops including gatherers. This is one of the highest-value uses of that item — worth keeping a few in stock specifically for Bear Hunt. If you don't have one, wait for troops to return and join whatever rallies are still active with the time remaining.
Why doesn't the Moose pet work in Bear Hunt?
The Moose's Horror Stare skill reduces enemy Squad Health. The Raging Bear doesn't have a Health stat — it only has Defense. The skill targets something that doesn't exist on this enemy and contributes zero damage. Save it for PvP events where Health reduction is meaningful. This is one of the most commonly wasted pet activations in the game and it's worth telling your alliance about it.
What's the fastest way to improve Bear Hunt damage as F2P?
In order of actual impact: (1) Level your best S+ joiner's first Expedition skill — Chenko is the usual early target, but Amadeus, Yeonwoo, Amane, Margot, Vivian, Wee & Woo, Ava, and Luna all belong in that premium pool when available. (2) Upgrade goggles and boots in Governor Gear for Lethality. (3) Prioritize Lethality research in the Academy. (4) Never skip Intel Missions. These four things alone will noticeably move your contribution within a few events.
Is Thrud worth using as a joiner?
More than most players think. Thrud's first Expedition skill is Archer and Infantry specific, making her slightly weaker than Hilde overall — but critically, it's not chance-based. That makes her more consistent than any B-Tier hero. If Hilde isn't available, Thrud is a legitimate A-Tier backup that most tier lists overlook.
Should Gen 7 players use Ava or Wee & Woo as joiners?
Use Wee & Woo and Ava as S+ Gen 7 joiners when their first Expedition skills are leveled. Wee & Woo give direct Squad Attack and Lethality; Ava's Dissolution brings damage-facing Defense Down. Do not send Charles as a joiner; his value is defensive. For build order and when Gen 7 is worth your gems, see the full Kingshot Gen 7 heroes guide.
Which Gen 8 hero should I send to Bear Hunt?
Luna, and only Luna. Her first Expedition skill, Driving Light, gives a flat +25% Squad Attack — the same skill shape and the same values as Amane's Tri-Phalanx and Margot's Warbringer, which makes her an S+ Group B joiner and the strongest flat Attack buff available. She is worth a slot in any rally, and she is the best pick for a rally that already has two Group A Lethality skills locked in.
Do not send Diego — his first Expedition skill, Defensive Guidance, gives Squad Defense and Health, which contributes nothing to bear damage. Do not send Liz either; her Alloyed Agent is chance-based, so it doesn't stack between joiners, and a maxed Liz can bump a lower-level Chenko out of the four active slots. Full detail in the Kingshot Gen 8 heroes guide.
Why doesn't Lethality always beat Attack as a hero skill?
Because, mechanically, a flat percentage Lethality skill and a flat percentage Attack skill of the same size are equivalent — both multiply into the same damage formula, so a +25% boost to either stat produces the same +25% gain to the total. The real factor that separates joiner heroes from each other is how their skills stack: Chenko, Amadeus, and Yeonwoo's skills add together with each other, while Amane and Margot's skills multiply against that group instead. That's why a mixed rally (some Chenko-type, some Amane-type) outdamages a rally stacked with four of the same hero, even though Lethality and Attack contribute equally on a skill-for-skill basis. Raw stat investment through gear and research is a separate matter — there, the stat that's currently lower on your account does give a bigger proportional gain per point added.
Wrapping Up
Bear Hunt is 30 minutes every two days. The alliances that hit 1.2B consistently aren't always the strongest — they're the most organized. Correct formation for your generation, right heroes in the right slots, Pitfall at Level 5 before the first rally, and a coordinated Final Push at the end. That's the formula.
The non-negotiables:
- Endgame formation is usually 1/10/89 — test it against 10/10/80 if you're Gen 4+
- Joiners: use your best leveled S+ option from Chenko, Amadeus, Yeonwoo, Amane, Margot, Vivian, Wee & Woo, Ava, or Luna. Once a rally has 2+ Chenko/Amadeus/Yeonwoo-type skills locked in, an Amane or Margot-type skill adds more in the next slot than a duplicate would. If none are built, send troops only. Never send a defensive or chance-based hero.
- Pitfall to Level 5 before every event — Intel Missions are mandatory, not optional
- No defense. Pure damage. Maximum Archers.
- Final Push: every member opens a rally in the last 5–7 minutes
- Moose pet skill does zero here — use Mighty Bison and Black Panther instead
Miss Bear Hunt events and your gear progression stalls in ways that take weeks to recover from. Show up prepared, coordinate with your alliance, and 1.2B becomes routine. Every alliance that hits 1.2B consistently has figured these things out — it's not a power gap, it's a knowledge gap.
What to do next
- Upgrade Priority Guide
- Hero Combinations Guide
- Kingshot Tools & Calculators